Overhead Blind Spot: The Kitchen Ceiling You’ll Live With Long After the Units Go In
You can spend three weekends choosing a cabinet colour, another two arguing about worktops, and still end up with a kitchen ceiling that looks like it was decided by accident. In a lot of British homes, that’s exactly what happens. The ceiling is the one surface nobody puts on the mood board. Then the units go in, the pendants go up, and suddenly that low bulkhead over the sink or the patchy paint above the hob is the thing you notice every single morning.
The ceiling is not just a lid. It carries the lighting, hides the extraction route, shapes how tall the room feels, and takes the brunt of steam, grease and cooking smoke. In a small kitchen, it can quietly make or break the layout. So before the first cabinet is fixed, it deserves a proper five-minute think — ideally longer.
Start with the awkward bits, not the paint colour
The ceiling is where a lot of kitchen renovation truths come out. Old pipework gets boxed in up there. A structural beam turns into a bulkhead. An old chimney breast leaves a strange step in the plaster. In Victorian terraces and 1930s semis, the ceiling often tells you what previous generations did to the room, and not all of it was pretty.
This is the moment to decide what stays, what gets boxed, and what gets moved. A bulkhead can be genuinely useful: it can house ducting for an extractor, give downlights somewhere to live, or cover a steel that isn’t going anywhere. But it also eats headroom and creates a visual step. If it’s going to be there, make it look intentional. A neat, straight bulkhead with a crisp edge is far better than a random box that appears after the electrician has been. Ask your fitter and electrician to agree the route before the plasterboard goes up, not after.
If you’re boxing in pipes, think about access. A small hatch or removable panel can save a lot of swearing later if a joint starts weeping. It’s not glamorous, but neither is cutting a hole in a freshly painted ceiling.
Plaster, timber or panels: what suits a steamy kitchen?
A standard plastered and skimmed ceiling is still the default for good reason. It’s seamless, relatively affordable, and works with almost any style of kitchen. The key detail is the board underneath. In a kitchen, especially around a hob, moisture-resistant plasterboard is a sensible upgrade over standard board. It won’t make the ceiling waterproof, but it gives you a bit more resilience in a room that gets steamy.
Timber cladding or tongue-and-groove boards can look lovely in the right house — a cottage, a period property, a room where you want a bit of warmth overhead. But a kitchen is not a bathroom. Grease and cooking fumes will find their way into every groove. If you go down this route, seal it properly and be prepared to clean it with more care than a flat painted surface. Dark timber can also make a low ceiling feel lower, so it’s worth standing in the room and looking up before you commit.
Panel systems — metal, composite or modular ceiling panels — are practical and increasingly popular in busy kitchens. They can hide services, integrate lighting, and wipe clean. The trade-off is cost and a slightly more commercial look. In a utility-style kitchen or a very hard-working family space, that can be a fair swap. In a period home where you’re trying to keep things soft, it may feel out of place.
And if the ceiling has an old Artex finish, don’t just scrape it and hope. In older UK homes, textured coatings can contain asbestos. Get it tested before anyone starts sanding or removing it. That is one of those boring checks that saves a very expensive problem later.
Paint finish: sheen is not the enemy
A kitchen ceiling takes more punishment than a bedroom ceiling. Steam, fat, smoke and the occasional energetic stir-fry all drift upwards. A dead-flat matt paint may look beautiful for about three weeks, but it can be a pain to wipe down. A washable matt or a low-sheen finish is usually the more sensible choice. Eggshell or a dedicated kitchen and bathroom paint can work well, provided it’s applied over a properly primed surface.
Very high gloss is rarely worth it in a kitchen. It shows every lump, bump and plastering wobble, and it can look dated fast. A soft off-white, pale grey or warm neutral is more forgiving. If you have a bulkhead or an awkward step in the ceiling, painting the ceiling and walls in a similar tone can blur the edges and make the room feel more joined-up. In a small kitchen, that can be a clever trick — but only if the lighting is good enough to stop it feeling like a cave.
Don’t forget the preparation. Stains from old leaks or cooking need a stain-block primer, or they’ll creep back through the new paint. Patches need filling and sanding properly. A ceiling is a large, flat surface, and it catches light at an angle that shows every shortcut.
Lighting and extraction need a route before the units arrive
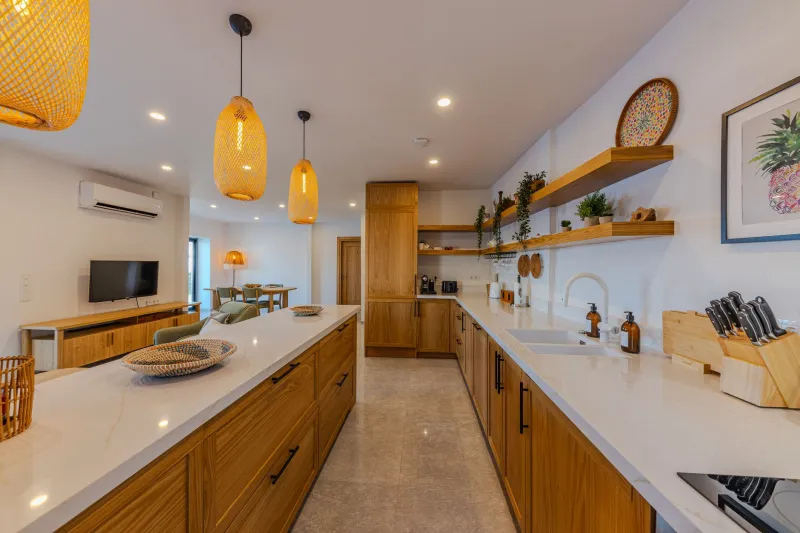
This is where ceiling decisions become layout decisions. Pendant lights over an island or peninsula can look brilliant, but they need to hang in the right place relative to the worktop, not just the room. Put them too low and they’ll be in your eyeline. Put them too close to a tall cabinet and they’ll feel cramped. In a small kitchen, a single pendant may be enough; in a larger space, a mix of ceiling lights and under-cabinet task lighting usually works harder.
Extraction is the other big one. A ducted extractor needs a route out, and that route often goes through the ceiling or a bulkhead. If you leave it until after the ceiling is finished, you’re either boxing it in afterwards or switching to a recirculating hood. Recirculating hoods have their place, but they don’t remove moisture in the same way, and filters need changing. If you’re planning a ducted system, agree the route early — through the ceiling void, along a bulkhead, or straight out through the wall. The Building Regulations cover ventilation, and your fitter or electrician should be able to flag what needs doing.
Budget notes for the overhead plane
The ceiling is one of those areas where quotes can go vague. “Ceiling prep” and “making good” can mean anything from a quick fill to a full re-board and skim. Ask for it itemised. Plastering costs vary by region and access, but as a rough guide, skim work is usually priced per square metre, and a bulkhead or boxed section is a separate job. Downlights, extractor ducting and any extra first-fix electrics should be listed too.
If money is tight, spend it on the things you can’t change later: the extraction route, the lighting points and the condition of the ceiling itself. Paint is easy to redo. A badly placed duct is not.
The doorway test
Before you sign anything off, stand at the kitchen door and look up. Then walk the room slowly. Check the sightlines. Does the bulkhead cut across the window? Do the pendants hang in the right place? Is there a shadowy corner that will feel gloomy in February? A ceiling can look perfectly fine on a plan and still feel wrong in the room. The doorway test catches more problems than a mood board ever will.
The ceiling may be the quietest plane in the kitchen, but it’s not a neutral one. Decide what it’s doing — hiding services, carrying light, keeping the room feeling tall — and then let the plaster, paint and fittings follow. That way it looks deliberate, not default.