The Daily Drop-Off: Designing a Kitchen Waste Station That Stays Fresh
Most kitchen projects begin with worktops, cabinet doors and the question of whether a double oven is really necessary. The bin tends to arrive much later, often as a flustered afterthought once the carcasses are ordered. That is a mistake. A kitchen waste station is not a bin shoved into a cupboard; it is a small piece of daily infrastructure. Get it right and nobody notices. Get it wrong and you will spend the next decade wrestling with a smelly cupboard that never quite closes.
Start with the collection calendar, not the cabinet
Before you decide how many internal bins you need, check what your local council actually collects. UK kerbside rules are wonderfully varied. Some authorities take a single mixed recycling bin; others expect paper, card, plastic and metal to be separated. Glass may go in the same box or need its own container. Food waste might be collected weekly in a small caddy, while general waste goes fortnightly. Garden waste is often a paid subscription and has nothing to do with your kitchen, unless you are in the habit of putting potato peelings in the wrong place.
The practical result is that a household in one postcode may need two internal streams and a household twenty minutes away may need four. Do not buy a triple pull-out because it looks tidy on a showroom display. Count the containers you genuinely fill each week, measure the council-issued caddies and bins, and then design around that reality. If your council collects food waste separately, a small lidded caddy on or near the worktop is more useful than a giant compartment you will never use.
Where the bin station actually belongs
The best position is rarely the emptiest corner. It is the point on your route between food preparation, the sink and the door to the outside. You want to scrape plates without walking across the kitchen, and you want to carry the bag out without performing a slalom around the island.
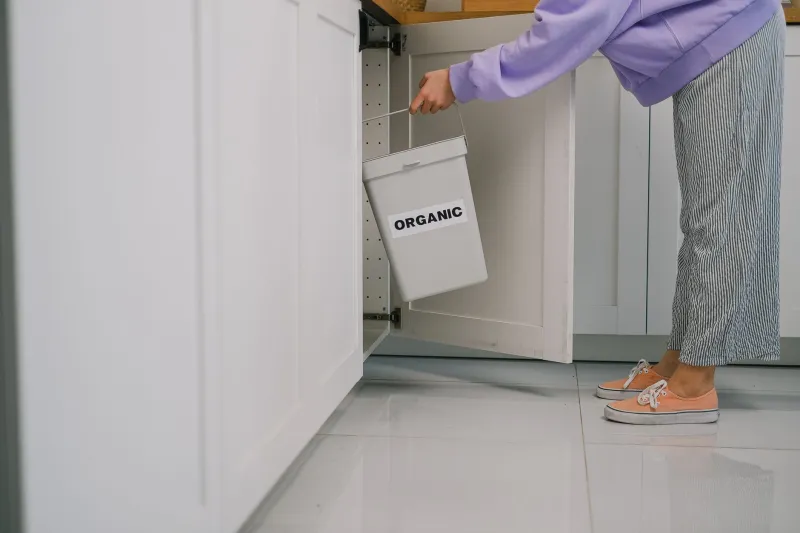
On a practical level, a pull-out waste station belongs in a base cabinet on the main run, ideally near the sink or prep area but not directly in front of the oven. Avoid tucking it into a corner where the door clashes with another unit or where you have to stand sideways to open it. If the kitchen is small, a 300mm-wide pull-out can work, but check the internal dimensions rather than the door width. A 400mm or 500mm unit gives you room for two or three removable buckets and a lid that actually seals.
Under-sink is the classic location, and it can work well, but only if the plumbing has been planned around it. Too many homeowners end up with a bin that fouls the trap or a pull-out that cannot slide past the dishwasher hose. Sort the sink waste and any water softener first, then size the bin unit. Also think about ventilation. A cupboard that is sealed tight, warm from the dishwasher and full of food waste is not a good home for anything.
The pull-out is only as good as its lining
A well-made bin pull-out has removable inner buckets, a wipeable base and a lid that closes properly. Those details matter more than the colour of the cabinet front. Look for a unit with a drip tray or a solid base that can be lifted out and washed. Raw chipboard and exposed cut edges will absorb whatever escapes, and no amount of scented liner will fix that.
Use bin liners that fit. An oversized bag bunched around the rim is an invitation for liquid to run down the outside of the bucket. For food waste, a compostable liner that suits your council’s collection scheme is sensible, but check the rules first; some authorities only accept certain types. Keep a spare caddy liner at the bottom of the clean bucket so you are not hunting for one with wet hands.
If your pull-out has a charcoal filter or a vented lid, replace the filter as instructed rather than treating it as a permanent fixture. And do not overfill. A bin that is wedged shut is a bin that will be left open, and an open bin in a warm kitchen is exactly the smell you were trying to avoid.
Smell is usually an airflow problem
It is tempting to solve odours by sealing everything in an airtight cupboard, but that can make matters worse. Damp food waste, warm air and no movement create a perfect little microclimate. A little passive ventilation helps: a vented plinth, a door with a discreet air gap, or simply a bin unit that is not packed tight against the carcass. Do not put the waste station next to the oven or directly above a heat source.
Emptying little and often beats any gadget. Rinse the buckets weekly, wipe the cabinet base with a dilute disinfectant, and leave the pull-out open to dry after cleaning. A small bowl of bicarbonate of soda at the back of the cupboard is an old trick for a reason, but it is a back-up, not a substitute for clean buckets and sealed lids.
Sizing, budget and the honest trade-offs
A basic pull-out waste unit can cost from around £150 to £600 depending on width, runners and bucket quality. That is before you factor in internal bins, liners and any ventilation detailing. In a small kitchen, the trade-off is usually drawer space. A 400mm bin pull-out may cost you a useful pan drawer, so be honest about which you will miss more. Many households do better with one larger general waste bucket and two slimmer recycling buckets than with four tiny compartments that fill in a day.
Also plan the route to the wheelie bin. If the outside bins live at the back of the garden, a lidded caddy that can be carried one-handed is worth more than a fancy internal system. And if you are renovating, ask your fitter to leave a service gap and a removable base panel. Future you, crouching over a spilled bag of rice, will be grateful.
The bin will never be the star of the kitchen. But it is used every single day, often several times before dinner. Give it a proper place in the plan and it will quietly do its job, which is all anyone can ask of a cupboard full of rubbish.