Beyond the Big Ceiling Light: Layering a Kitchen for Dark British Evenings
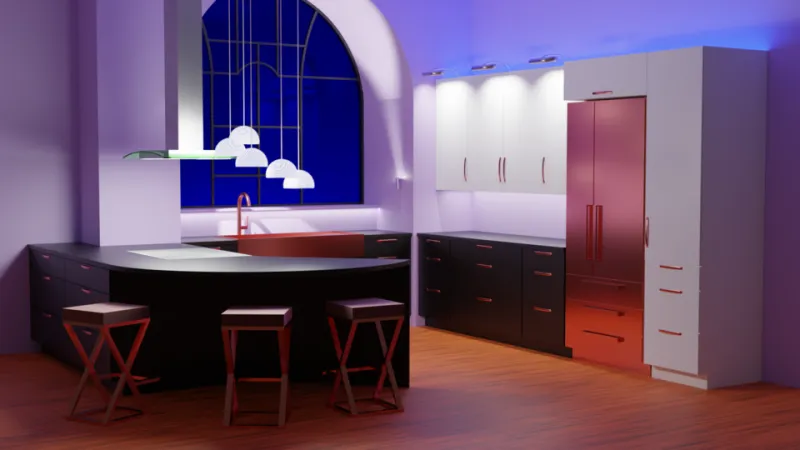
Photo: Stilfehler, CC BY-SA 4.0, via Wikimedia Commons
By early November, the kitchen has become the brightest room in the house and the darkest by four o'clock. A single ceiling light can make a small room feel like a waiting area: bright in the middle, shadowy at the edges, and harsh when you are chopping onions. Good kitchen lighting is not about more fittings. It is about layers, placed where the work happens.
The three layers, in plain English
Ambient lighting is the general fill. It lets you move around safely and stops the room feeling like a cave. Task lighting is focused light for work: under wall cabinets, over the sink, along the hob. Accent lighting is the decorative layer: pendants over an island, shelf lights, a glow inside a glass cabinet or along the plinth. Most UK kitchens have ambient lighting only. The upgrade is to add the other two.
Plan for dark afternoons, not just evenings
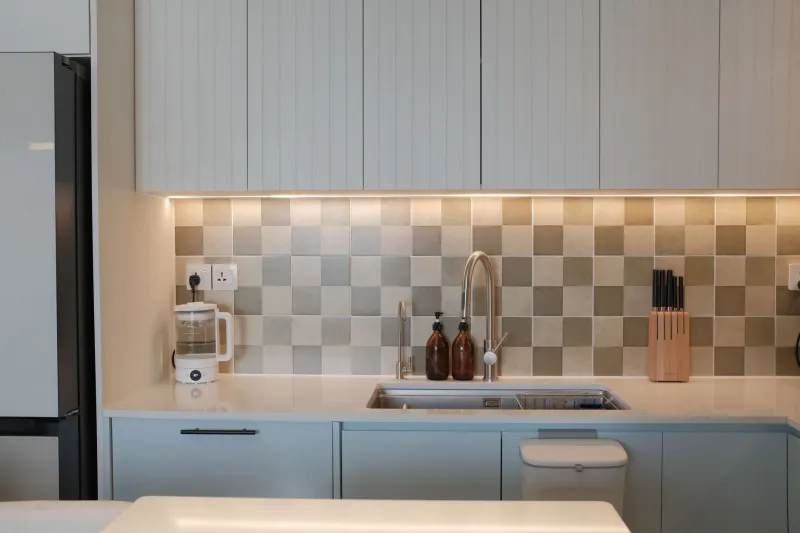
This winter, think about the hours between 3pm and 7pm, when the sky is grey and the overhead light is on but the worktops are still in shadow. That is when under-cabinet lighting earns its keep. It should light the worktop, not your eyes. Choose a diffused strip or a shallow profile, and keep the colour temperature warm white, around 2700K to 3000K. Cool white makes food look grey and can feel clinical in a home.
Under-cabinet lighting: the best-value upgrade
A hardwired LED strip under the wall cabinets is usually the highest-impact lighting change in a kitchen. It gives you a bright, even light for prep and it makes the room feel calmer because the contrast between the ceiling light and the worktop is reduced. Expect to pay £250 to £600 installed for a typical run, depending on whether the electrician needs to chase walls and fit a dimmable driver. Plug-in strips are cheaper, £60 to £150, but the cable has to go somewhere and they are harder to dim properly.
Pendants over an island: spacing and height
Pendants are the layer most people get wrong. They are not task lights, so they do not need to be brilliant white or very bright. They need to frame the island and give a warm pool of light. As a rule, the bottom of the shade should sit about 750mm to 900mm above the worktop. Space two pendants about 600mm to 750mm apart, or use one larger fitting centred on the island. If you have a hob on the island, check the manufacturer's clearance and avoid a pendant that dangles into your sightline while you cook.
Dimming is not a luxury
A kitchen needs different light levels at 7am and 9pm. Dimming lets one fitting do both. Plan dimmable drivers and compatible dimmer switches at the first fix, because retrofitting later can mean changing drivers or adding wiring. Trailing-edge dimmers are generally the safer choice for LED, and a two-way switch at the kitchen door and the dining end is worth the extra cable. Budget £60 to £150 per dimmer circuit, plus the cost of the driver.
Separate circuits and switching
At minimum, put ambient, task and accent lighting on separate switches. Better still, split the task lighting into sink, hob and prep zones if the room is large. This sounds fussy until you are cleaning up and only need the under-cabinet light. Ask the electrician to label the circuits clearly. In a renovation, the extra cable and switching is a small part of the total cost if it is done before the plaster goes on.
Accent lighting that is not a gimmick
Accent lighting should add depth, not clutter. A warm strip on top of wall cabinets can wash the ceiling, but only if the ceiling is clean and the strip is hidden. Shelf lights make a dresser feel special. A plinth light can help at night, but it will show every crumb. Use accent lighting on a dimmer and keep it subtle. If you are not sure, spend the money on task lighting first.
Glare and colour temperature
Glare is the enemy in a small kitchen. Bare LED strips reflect off worktops and shiny splashbacks. Use a diffuser, angle the strip towards the wall, or choose a deeper profile. For colour temperature, stay consistent: 2700K in living areas, 3000K in the kitchen, and 4000K only in a utility room if you really want it. A colour rendering index of 90 or above makes food and wood look better. In 2026, good LED fittings are cheaper and more dimmable than they were a few years ago, so there is less excuse for a single cold downlight.
What it costs
For a typical UK kitchen renovation, a layered lighting plan might add £800 to £2,500 to the electrical bill, depending on the number of points and whether walls are being chased. A full lighting rewire in an older kitchen can be £1,500 to £3,500. If you are already having the ceiling down or the walls replastered, do it now. The cost of adding a circuit later is mostly labour and mess.
A simple plan for renovation
Walk around the kitchen at dusk and list every place you need light. Mark the work zones on the plan. Decide which layer does which job. Ask for separate switching and dimming at the first fix. Then choose fittings that are easy to clean and warm in colour. A kitchen lit in layers feels bigger, calmer and more expensive than it is. The big ceiling light can stay, but it should not be the only thing on the plan.